
Globally used files
More actions
This page lists files that are unused on this wiki but are used on other wikis in the farm.
These files are not used on this wiki but are used on at least one other wiki in this wiki farm.
Showing below up to 50 results in range #14,251 to #14,300.
 STO Training Camps What Goes on There.jpg (en.battlestarwiki.org)
- STO Training Camps What Goes on There.jpg (en.battlestarwiki.org)
 Sa's Place.jpeg (en.battlestarwiki.org)
 Sacover.jpg (en.battlestarwiki.org)
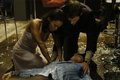 Sacrifice3.jpg (en.battlestarwiki.org)
- Sacrifice3.jpg (en.battlestarwiki.org)
- Sacrifice3.jpg (en.battlestarwiki.org)
- Sacrifice3.jpg (en.battlestarwiki.org)
- Sacrifice3.jpg (en.battlestarwiki.org)
 Sacrifice - it isn't Sharon, it's a machine.mp3 (en.battlestarwiki.org)
- Sacrifice - regarding Sharon.mp3 (en.battlestarwiki.org)
- Sacrifice - what if the terrorists are right.mp3 (en.battlestarwiki.org)
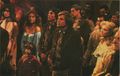 Saga Of A Star World - Deleted Scene.jpg (en.battlestarwiki.org)
- Saga Of A Star World - Deleted Scene.jpg (en.battlestarwiki.org)
- Saga Of A Star World - Deleted Scene.jpg (en.battlestarwiki.org)
 Saga of a Fugitive Fleet - Disc Spread and Booklet.jpg (en.battlestarwiki.org)
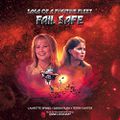 Saga of a Fugitive Fleet - Fail Safe.jpg (en.battlestarwiki.org)
- Saga of a Fugitive Fleet - Fail Safe.jpg (en.battlestarwiki.org)
 Saga of a Fugitive Fleet - Main Cover.jpg (en.battlestarwiki.org)
 Saga of a Fugitive Fleet - Paradise Void.jpg (en.battlestarwiki.org)
- Saga of a Fugitive Fleet - Paradise Void.jpg (en.battlestarwiki.org)
 Saga of a Fugitive Fleet - Quarantine World.jpg (en.battlestarwiki.org)
- Saga of a Fugitive Fleet - Quarantine World.jpg (en.battlestarwiki.org)
 Saga of a Fugitive Fleet - Space Mutiny.jpg (en.battlestarwiki.org)
- Saga of a Fugitive Fleet - Space Mutiny.jpg (en.battlestarwiki.org)
 Saga of a Star World, Part 1 Credits.PNG (en.battlestarwiki.org)
- Saga of a Star World, Part 1 Credits.PNG (en.battlestarwiki.org)
 Saga of a Star World reprint cover.jpg (en.battlestarwiki.org)
- Saga of a Star World reprint cover.jpg (en.battlestarwiki.org)
 Sagastarworld.jpg (en.battlestarwiki.org)
- Sagastarworld.jpg (en.battlestarwiki.org)
 Sagittarius is bleeding book 3.jpg (en.battlestarwiki.org)
- Sagittarius is bleeding book 3.jpg (en.battlestarwiki.org)
- Sagittarius is bleeding book 3.jpg (en.battlestarwiki.org)
 Sal.jpg (en.battlestarwiki.org)
 Salvage and Repair.JPG (en.battlestarwiki.org)
 Sam Adama 2.jpg (en.battlestarwiki.org)
- Sam Adama 2.jpg (en.battlestarwiki.org)
- Sam Adama 2.jpg (en.battlestarwiki.org)
- Sam Adama 2.jpg (en.battlestarwiki.org)
- Sam Adama 2.jpg (en.battlestarwiki.org)
- Sam Adama 2.jpg (en.battlestarwiki.org)
- Sam Adama 2.jpg (en.battlestarwiki.org)
- Sam Adama 2.jpg (en.battlestarwiki.org)
 Sam Adama Fidelia Fizekas Reunited.png (en.battlestarwiki.org)
 Sam Adama and U-87, 1x13.jpg (en.battlestarwiki.org)
- Sam Adama and U-87, 1x13.jpg (en.battlestarwiki.org)
- Sam Adama and U-87, 1x13.jpg (en.battlestarwiki.org)
- Sam Adama and U-87, 1x13.jpg (en.battlestarwiki.org)
- Sam Adama and U-87, 1x13.jpg (en.battlestarwiki.org)