
Globally used files
More actions
This page lists files that are unused on this wiki but are used on other wikis in the farm.
These files are not used on this wiki but are used on at least one other wiki in this wiki farm.
Showing below up to 50 results in range #401 to #450.
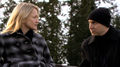
 Amanda and Daniel on Sarno, 1x04.jpg (en.battlestarwiki.org)
- Amanda and Daniel on Sarno, 1x04.jpg (en.battlestarwiki.org)
- Amanda and Daniel on Sarno, 1x04.jpg (en.battlestarwiki.org)
- Amanda and Daniel on Sarno, 1x04.jpg (en.battlestarwiki.org)
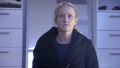
 Amanda and Duram, 1x16.jpg (en.battlestarwiki.org)
- Amanda and Duram, 1x16.jpg (en.battlestarwiki.org)
- Amanda and Duram, 1x16.jpg (en.battlestarwiki.org)
 Amanda holds Zoe, 1x18.jpg (en.battlestarwiki.org)
- Amanda holds Zoe, 1x18.jpg (en.battlestarwiki.org)
- Amanda holds Zoe, 1x18.jpg (en.battlestarwiki.org)
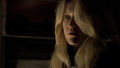
 Amanda in Zoe's room, 1x06.jpg (en.battlestarwiki.org)
- Amanda in Zoe's room, 1x06.jpg (en.battlestarwiki.org)
- Amanda in Zoe's room, 1x06.jpg (en.battlestarwiki.org)
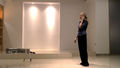
 Amanda steals the holoband, 1x16.jpg (en.battlestarwiki.org)
- Amanda steals the holoband, 1x16.jpg (en.battlestarwiki.org)
- Amanda steals the holoband, 1x16.jpg (en.battlestarwiki.org)
- Amanda steals the holoband, 1x16.jpg (en.battlestarwiki.org)
 Amanda unvanquished, 1x11.jpg (en.battlestarwiki.org)
- Amanda unvanquished, 1x11.jpg (en.battlestarwiki.org)
- Amanda unvanquished, 1x11.jpg (en.battlestarwiki.org)
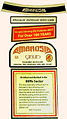 Ambrosia2.jpg (en.battlestarwiki.org)
- Ambrosia2.jpg (en.battlestarwiki.org)
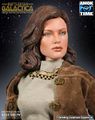 Amok Time - Athena Figure - 1.jpg (en.battlestarwiki.org)
- Amok Time - Athena Figure - 1.jpg (en.battlestarwiki.org)
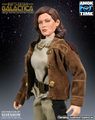 Amok Time - Athena Figure - 2.jpg (en.battlestarwiki.org)
- Amok Time - Athena Figure - 2.jpg (en.battlestarwiki.org)
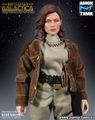 Amok Time - Athena Figure - 3.jpg (en.battlestarwiki.org)
- Amok Time - Athena Figure - 3.jpg (en.battlestarwiki.org)
 Amok Time - Boomer Figure - 1.jpg (en.battlestarwiki.org)
- Amok Time - Boomer Figure - 1.jpg (en.battlestarwiki.org)
 Amok Time - Boomer Figure - 2.jpg (en.battlestarwiki.org)
- Amok Time - Boomer Figure - 2.jpg (en.battlestarwiki.org)
 Amok Time - Boomer Figure - 3.jpg (en.battlestarwiki.org)
- Amok Time - Boomer Figure - 3.jpg (en.battlestarwiki.org)
 Amok Time - Cain Figure - 1.jpg (en.battlestarwiki.org)
- Amok Time - Cain Figure - 1.jpg (en.battlestarwiki.org)
 Amok Time - Cain Figure - 2.jpg (en.battlestarwiki.org)
- Amok Time - Cain Figure - 2.jpg (en.battlestarwiki.org)
 Amok Time - Cain Figure - 3.jpg (en.battlestarwiki.org)
- Amok Time - Cain Figure - 3.jpg (en.battlestarwiki.org)
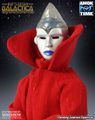 Amok Time - Lucifer Figure - 1.jpg (en.battlestarwiki.org)
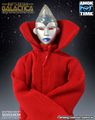 Amok Time - Lucifer Figure - 2.jpg (en.battlestarwiki.org)
 Amok Time - Lucifer Figure - 3.jpg (en.battlestarwiki.org)
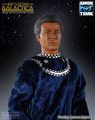 Amok Time - Tigh Figure - 1.jpg (en.battlestarwiki.org)
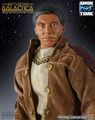
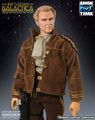
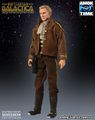
- Amok Time - Tigh Figure - 1.jpg (en.battlestarwiki.org)
- Amok Time - Tigh Figure - 1.jpg (en.battlestarwiki.org)
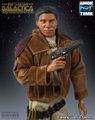
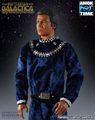 Amok Time - Tigh Figure - 2.jpg (en.battlestarwiki.org)
- Amok Time - Tigh Figure - 2.jpg (en.battlestarwiki.org)
- Amok Time - Tigh Figure - 2.jpg (en.battlestarwiki.org)
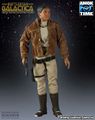
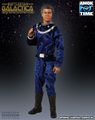 Amok Time - Tigh Figure - 3.jpg (en.battlestarwiki.org)